
Another Ornament Thursday (once again, it is Thursday Chez Short One, if not Chez Blogger), another week closer to Christmas. Everyone have their Christmas shopping done? No? Are we panicking yet? (Don't answer that.) Well, you'll note that I've violated the four criteria I laid down last week. However, several people pointed out that the non-safe-for-Short-One ornaments could simply be put higher up on the tree (although I still have disaster scenarios where he pulls the whole tree down running in my head). Plus, I found it too hard to resist the call of metal clay and beads this week.
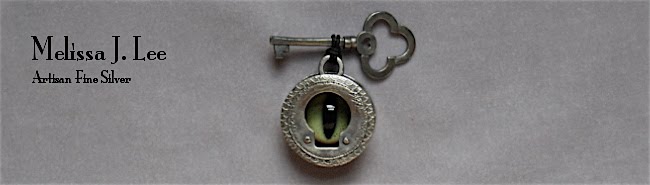
This piece is a collaborative effort between myself and the SO. As you may have noted from older photos featuring his artwork, the SO has an art table with a roll of craft paper attached. We have quite a bit of his original work stored up already, and I'm always on the lookout for different ways to display/use it, other than "refrigerator" art. For one thing, a number of privileged relatives will receive packages wrapped in unique, one-of-a-kind, handmade wrapping paper this year. (Hopefully the crayon won't come off on their hands.) So, I decided that an ornament with a small piece of artwork in it would be perfect for this year and following years. This is simply a ring made with PMC. I cut the artwork to fit inside and then filled the area with resin to fix it in place. Also, since it is a ring, it is double-sided. I have a cute photo of the artist as a young man on the flip side of this one. Oh, and the little Christmas-y dangle is made from faceted red jasper and a faceted rondelle of peridot.
Instructions to make this ornament follow.
Photo Ornament
©2007 Melissa J. Lee
Materials:
PMC3 packet (10g is more than enough)
texture tiles
roller
pin tool (or toothpick)
playing cards
work surface
olive oil
water
brush
kiln
liver of sulphur
Wenol silver polish
2 photos or artwork etc.
glue
pen
scissors
Mod Podge (or other sealer)
resin (I use UV resin from Art Clay World)
resin cleaner (for UV resin)
UV light (for UV resin)
clear packing tape
nitrile gloves
empty syringe
2 jump rings
1 2" head pin
1 faceted red jasper bead
1 faceted peridot rondelle
scrap of red ribbon
Apply olive oil to work surface, roller and hands to prevent sticking. Roll out PMC3 5 cards thick. (I should add at this juncture that, if you don't own a kiln, you could easily substitute polymer clay and coat the piece with Pearl-Ex powder to give it a metallic look.) Texture on both sides with texture tile of your choice. Using two sizes of biscuit cutters (or a circle template, whichever), cut a ring to whatever size you desire (mine has an outside diameter of 2" before firing). Designate a top and bottom and poke holes in both sides. Either finish the piece while leather hard with a little water and a brush or sand piece once bone dry to finish (if the latter, I highly recommend wearing a mask rated for metal work). Fire in kiln at 1290F for 10 minutes. Remove oxidation with brush. Prepare liver of sulphur solution (I used hot water, since I wanted a dark patina here, but cold is easier to control) and dip brushed piece in the solution. Rinse in water once you attain the patina you desire. Polish with Wenol silver polish to bring out pattern.
Select and print images you would like to place in the pendant. Put PMC ring on top of image and, with pen, trace the inside circle. Do this for both images. Cut images out carefully. Using glue, paste images back-to-back. Finally, images must be sealed before sinking in resin. I apply 2 coats of Mod Podge to each side and dry thoroughly. Don't worry if the Mod Podge leaves a little streakiness - this will not be visible, once the image is coated in resin.
Clean PMC ring thoroughly with alcohol pad and refrain from touching the piece with your bare hands after that (wear your nitrile gloves). Dry thoroughly. Cut length of clear packing tape and place the PMC ring firmly on the packing tape. You must ensure that there are no bubbles or gaps between the ring and the tape - otherwise, the resin will dribble out and you'll end up with a sticky mess. Also, I like to fold down the ends of the tape, so I have non-sticky "handles", if I need to manipulate the piece at all (which I usually do). Prepare resin (whichever type you choose). Apply a thin layer of resin within the ring, enough to barely coat the tape inside the ring. I find that I have more control over resin application if I use a syringe, so I've put that on the list. You don't technically need it, of course. For UV resin, cure this layer by placing under UV light for 3 minutes before proceeding to the next step. Place your double-sided image in the ring. Apply a second layer of resin to cover the image facing upwards. Allow the resin to cure (or cure UV resin by placing under UV light). Once resin is fully cured, you may remove the tape. For UV resin, apply resin cleaner to both sides to finish.
To finish, wire wrap red jasper and peridot beads and attach to pendant with jump ring. Attach second jump ring at the top and thread ribbon through to hang pendant.
If anyone has any questions regarding these instructions, please feel free to leave me a comment. Oh, and one thing I forgot to do was stamp the date on the PMC before firing. I would hope to make one of these each year, so next year I'll definitely add the date.
Thanks for stopping by to look at my ornament this week! But wait, there's more! Please visit these lovely blogs for more ornament goodness:
Sara Naumann
Lynn Kvigne
Candie Cooper
Katie Hacker
Margot Potter
Linda Augsburg
Melanie Brooks Lukacs
Art Bead Scene
Cindy Gimbrone
Suzanne
Humblebeads
Polymer Clay Craft Gossip
Debba Haupert
Elaine Luther
Rebecca Peck
Jean Yates
Michelle McGee
Jenny Harada
Jennifer Heynen
Hali Chambers
Kriss Kramer
Brandy Lung Gill
Lisa Liddy
Cheers!
ps. Just to clarify from yesterday - the one day holiday sale in my Etsy store will start at midnight Eastern Standard Time on Friday. I'll have the SO pick the discount rate out of a hat before he goes to bed, but there won't be any special announcement about that on the blog before midnight. I'm going to manually change the prices, so if there's something you like, please wait until the item is marked "Sale" before purchasing. Thanks!


15 comments:
That turned out great!
And, no, I'm not ready for Christmas. I need a few more weeks!
oooo!! Lovely ornament! I never start shopping until the last two weeks - I'm odd, I know, because I think it's fun!
This is so beautiful. And a perfect way to preserve SO's art in an artful way.
Going to the close-up of the ornament showed all it's great details. It's beautiful.
What a great design.
Gorgeous.
Cheers,
Margot
I'm with you Christina! And even the stuff I've bought - half of it still needs to be shipped out. Yikes.
Oh, Cindy, you're a brave woman. I'm getting old and creaky - I can't stand the crowds...
Thanks, Katie. I'm grateful to Ornament Thursday, as I've had something like this on my project list since the summer. OT got me motivated to actually make it!
Thanks for taking a closer look, Kriss! (I think the SO's artwork is advanced for his age, but I suppose I'm a little biased.)
Thanks, Margot! I had fun making this. Wish I'd remembered to stamp the date on it, though. Next year...
That is fantastically creative and beautiful. Yes, I'm in full panic mode re: the bit of shoppin I do need to get done. Has been difficult due to inclement weather. Trying to pick up pieces after huge ice storm hit Monday night into Wed a.m. Has caused alot of damage and much clean-up to do; now we have snow coming on top of that. What are my chances for getting out to shop when I have to deal with that and a full-time job. About zilch. Thank goodness I started making gifts for Christmas back in August and I still have plenty of beading goods to work with. Wow--I'm tired!
This is really beautiful! I might just have to try making one of these! Thanks for the inspiration!
Melissa, NOT that I want to make more work for you, but you should make two each year, one for the SO and one for you, so when the SO becomes the TO, you both have one! It's a great idea.
And no, I'm REALLY not ready for Christmas. I ask, is there anything wrong with New Year Cookies??
This is SO SWEET! It looks like a pendant to be worn. :-)not-ready-for-Christmas-Hali
Thanks for sharing the SO's artwork with us! I had to giggle when I read about the wrapping paper, we used the same "custom" paper when my kids were younger! The ornament is just beautiful!
That is TRULY beautiful!
Vickie - oh, dear, hope all is well weather-wise with you now. My folks live in Okla. and they were without power for several days after the ice storm hit.
Brandi - Thank you so much! Please do try it! It was unexpectedly fun to make, and I like having a memento for the year for the SO.
Linda - That's a great idea - it hasn't occured to me yet that the SO will one day have a tree (and family) of his own. Sigh. Time passes so quickly. I think New Year's cookies are a brilliant idea!
Hali - I have to admit, I've been temted to wear it, although it's just large enough to give one that 70s medallion feel. (Although the 70s are "in" again, right?)
Rebecca - Great minds think alike! If you have any other ideas for kid's artwork, please do share! I really don't want to throw any of it away, but we have quite a lot lying around!
Thank you so much Michelle - I do like the SO's artwork myself (bias or no). I appreciate it!
Hi,
I noticed that the UV resin is available in 2 sizes from art world. How far does it go? I'm interested in it for jewelry, so I wouldn't be making huge pieces. I don't want to make a huge investment now, but the size for $10 seems small. Thanks for your help. Wyanne
Hi Wyanne,
Well, it depends on what you are making. If you are using the deep molds, then 10g won't take you terribly far. However, a piece like this ornament with its very shallow bezel hardly uses any resin at all, so you could get a decent number of pieces from the small jar. Whole Lotta Whimsy also sells UV resin, although I have never purchased from there. They may have different sized pots, though. Good luck!
Post a Comment